Setting up your Bike with Tubeless Tyres - FTP Guides
Your Ultimate Checklist for Going to Tubeless Tyres
Making the switch to a tubeless tyres setup can reduce flats and improve your ride quality, but it requires a few specific items and a bit of know-how. This guide breaks down everything you'll need to successfully get started.
The Essentials: What You Need to Get Rolling with Tubeless Tyres
Before you begin, make sure you have the following core components:
* Tubeless-Ready Wheels: Your rims must be designed to work with tubeless tires. If your wheels have spoke holes, you'll also need tubeless rim tape.
* Tubeless Tires: Use tires specifically labeled as "tubeless-ready" or "TL" (Tubeless). They have a reinforced bead that forms an airtight seal with the rim.
* Tubeless Valves: These valves have a rubber base that seals against the rim's valve hole. They also typically come with a locknut to secure them in place.
* Sealant: This is the key to tubeless technology. The liquid sealant coats the inside of your tire, and when a small puncture occurs, it rushes to the hole and seals it from the inside.
* A High-Volume Pump or Compressor: Seating a tubeless tire bead requires a quick burst of air to pop it into place. A floor pump with a high-volume chamber, a CO2 cartridge, or an air compressor is highly recommended for this step.
Tools for a Smooth Installation
Having the right tools can turn a frustrating installation into a seamless process.
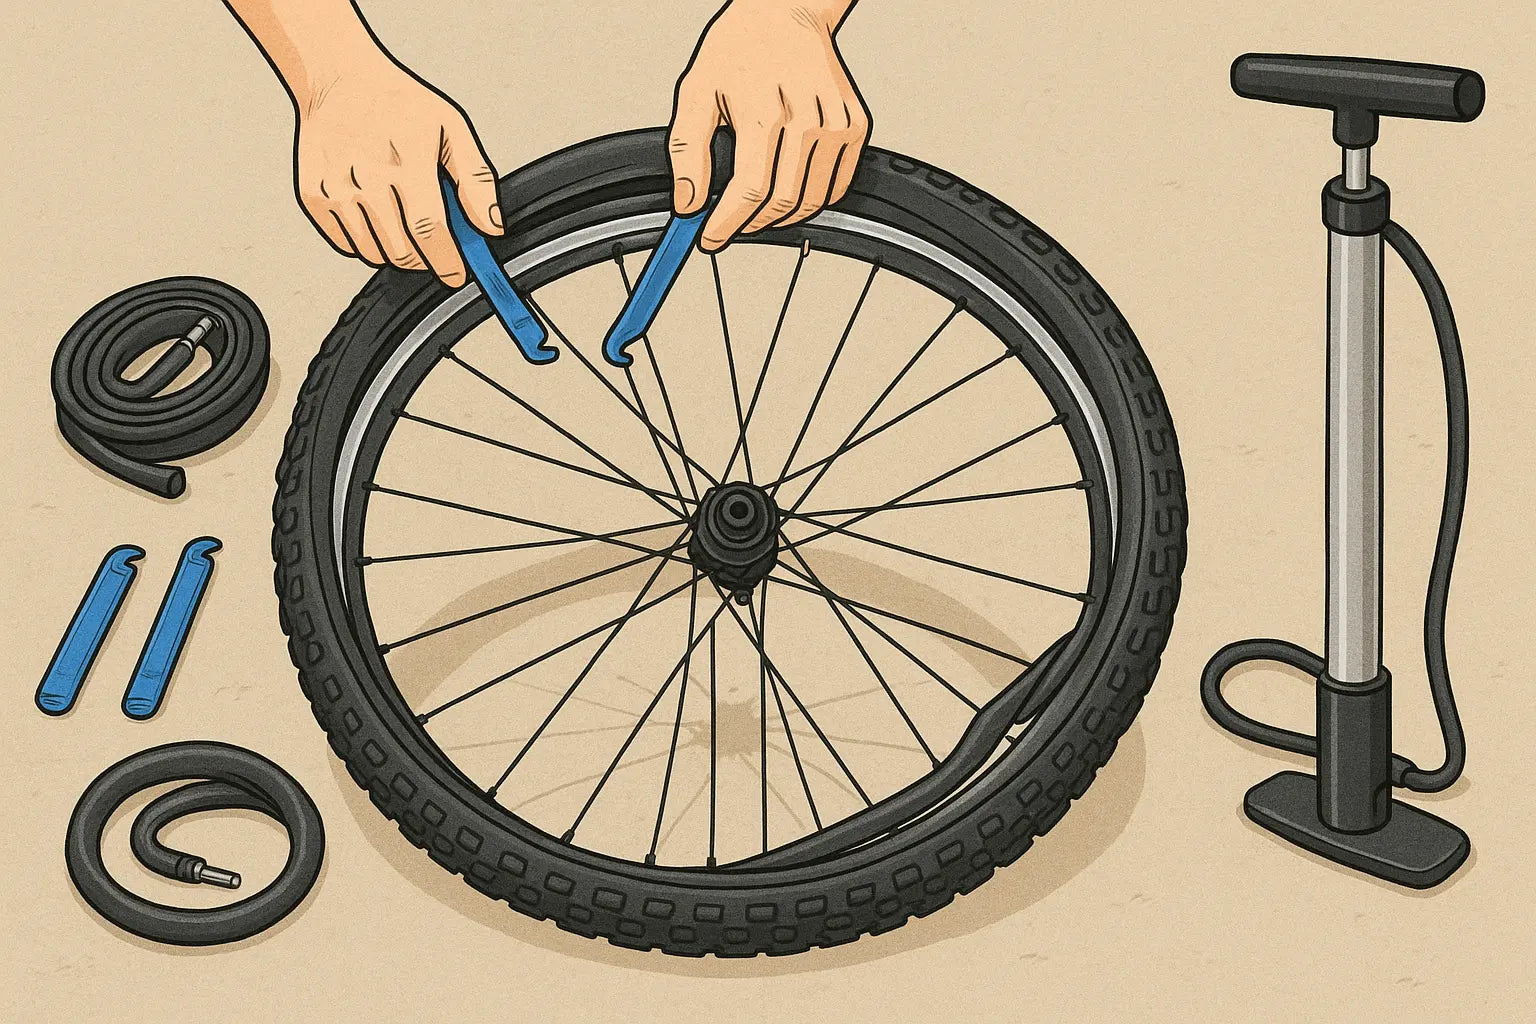
* Tire Levers and/or a Bead Jack: Tubeless tires often have a tight fit. A good set of tire levers will help, but a tire bead jack can be a lifesaver for particularly stubborn tires.
* Valve Core Remover Tool: This small tool is essential for easily adding sealant through the valve stem and for cleaning or replacing valve cores.
* Sealant Injector Syringe: While some sealants come in bottles with an applicator tip, a dedicated syringe makes it easy to measure the exact amount of sealant you need and inject it without a mess.
Your On-the-Road Repair Kit
Even with a tubeless setup, it's wise to carry a few items for roadside emergencies.
* Tubeless Tire Plugs ("Bacon Strips"): For larger cuts that sealant can't handle, these sticky plugs are a quick fix to get you home.
* A Mini Pump or CO2 Cartridges: Use these to re-inflate your tire after a puncture and to top off air pressure on the go.
* A Spare Tube: For a catastrophic failure, such as a large sidewall tear, a regular tube is your ultimate backup plan. Consider carrying a lightweight TPU tube, which can be more compact.
* Multi-Tool: A basic bike multi-tool with a chain breaker and a few hex keys is always a good idea.
Switching to a tubeless setup is one of the best upgrades you can make to your bike, but it does require a little bit of preparation and patience. Once you have all the necessary components and tools ready to go, you can follow these step-by-step instructions to get your tubeless wheels ready to ride.
Step 1: Prep the Wheel
Start with a clean and dry wheel. If your wheels already have rim tape, make sure it’s a tubeless-ready type. If not, or if your rim tape is old and damaged, you'll need to install a new layer of tubeless tape. This tape is essential for creating an airtight seal.
To install the tape, find the valve hole on your rim and begin wrapping the tape two spoke holes to the side of it. Keep the tape taut as you press it down firmly in the center of the rim bed. Overlap the start and end of the tape by about four to six inches. Once you’re done, use a small, sharp object to carefully puncture a hole through the tape at the valve hole.
Step 2: Install the Valve Stem
Insert the tubeless valve stem through the valve hole from the inside of the rim. Place the included O-ring and locknut onto the valve stem on the outside of the rim. Hand-tighten the locknut until it's snug. Don’t overtighten it, as this can damage the rubber base and prevent an airtight seal.
Step 3: Mount the Tire
Mount one side of the tire bead onto the rim. You can do this by hand for most tires, but if the fit is tight, you may need a tire lever. Next, carefully slide the other side of the tire bead onto the rim, leaving a small gap at the top to pour in your sealant.
Step 4: Add Sealant
Before fully mounting the tire, it’s time to add the sealant. There are two common methods for this:
* Pouring directly into the tire: This is a simple method. Simply pour the recommended amount of sealant directly into the tire at the opening you left. Then, finish mounting the tire bead onto the rim. This can be a bit messy, but it works well.
* Injecting through the valve stem: This is a much cleaner method. To do this, you'll need a valve core remover and a sealant injector syringe. Using the valve core remover, unscrew and remove the valve core from the valve stem. Attach the sealant syringe and inject the recommended amount of sealant directly into the tire through the valve stem. Once the sealant is in, re-install the valve core and make sure it’s tight.
Step 5: Seat the Tire Bead
This is the most critical and often most challenging step. The goal is to get the tire's beads to “pop” into the rim's bead shelf, creating a firm, airtight seal.
To do this, use a high-volume pump, air compressor, or CO2 cartridge. Inflate the tire with a rapid burst of air. You should hear a series of loud pops or pings as the tire bead snaps into place. Continue to inflate the tire to a higher pressure (around 30-40 psi) to ensure both sides of the bead are fully seated.
If you are struggling to get the tire to seat, you can try these tricks:
* Add a bit of soapy water to the tire beads to help them slide into place more easily.
* Bounce the tire gently while inflating to help the sealant spread and the bead settle.
Step 6: Shake and Spin
Once the tire is seated, give the wheel a good spin and a vigorous shake. This helps the sealant coat the inside walls of the tire and seal any small gaps or punctures that may be present. This step is what activates the self-sealing property of the tubeless system.
Step 7: Final Check and Air Pressure
Check for any hissing sounds, which would indicate a leak. If you hear a small leak, lay the wheel flat on a bucket, rotate it a few times to get the sealant to that area, and let it sit for a few minutes. If it's a larger leak, you may need to re-inflate and re-shake.
Once you are sure the tire is sealed, you can deflate it to your desired riding pressure. Remember, a major benefit of going tubeless is being able to ride with lower pressures for improved grip and comfort.
Now you're ready to hit the trail or road with confidence. What kind of riding are you most looking forward to with your new tubeless setup?